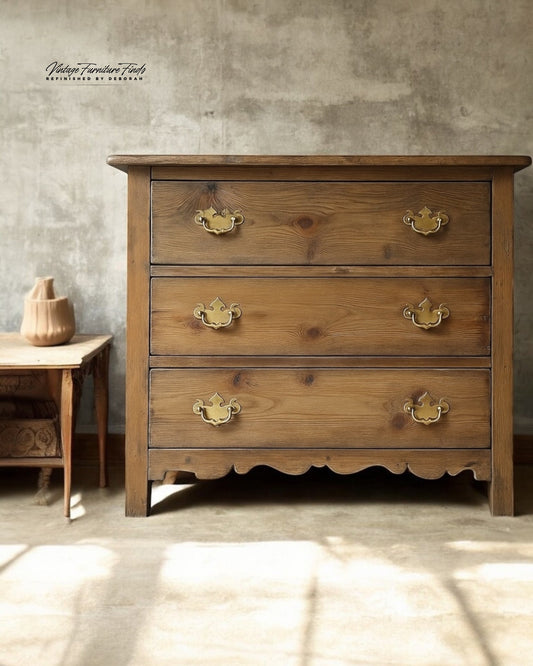
Perfect for furniture lovers chasing that warm, rustic luxe look!
If you’ve ever admired the rich, earthy brown finish on Pottery Barn pieces, you’re not alone. That signature Sienna Brown tone is timeless—warm, cozy, and sophisticated. And guess what? You can recreate it at home with just a few high-quality products, including a paint wash using Silk Mineral Paint in “Umber” by Dixie Belle. Below, I’ll walk you through the exact process I use, including a vital trick that makes all the difference: sealing your raw wood before applying the wash.

What You’ll Need:
• Dixie Belle Silk Mineral Paint – Umber
• Zinsser SealCoat Universal Sanding Sealer (This is your secret weapon!)
• Polyvine Wax Finish Varnish – Dead Flat or Satin
• Paint wash supplies (mixing container, soft brush, rags, water sprayer)
Step-by-Step: The Sienna Brown Pottery Barn Finish
Step 1: Prep Your Piece
Start with raw wood or a fully stripped surface. Lightly sand if needed to open up the wood grain. Make sure it’s clean and free of dust, grease, or leftover finish.

Step 2: Seal with Zinsser SealCoat
Before applying your paint wash, it’s crucial to seal the wood with Zinsser SealCoat Universal Sanding Sealer. Why? Because this step gives you control. The sealer prevents the wash from absorbing too unevenly or too dark in some areas.
• Apply one coat with a foam or synthetic brush.
• Let dry for about 30 minutes.
• Lightly scuff sand with a fine sanding pad (320 grit) to smooth any raised grain.
• Wipe off the dust.
Step 3: Mix Your Umber Paint Wash
Silk Mineral Paint in Umber is the perfect warm, rich brown with subtle depth—ideal for mimicking Pottery Barn’s Sienna tone.
• Mix a 1:2 ratio of Umber paint and water in a container.
(You can adjust to thinner or thicker depending on how transparent you want the wash.)
• Stir well until smooth.
Step 4: Apply the Paint Wash
Work in small sections:
• Brush on the wash liberally with a soft synthetic brush.
• Let it sit for 10–30 seconds depending on how much color you want to deposit.
• Wipe back gently with a lint-free rag, moving with the grain.
• You can mist with water to keep it workable.
Repeat or layer as needed for more depth.

Step 5: Seal the Finish
After your wash is dry (give it at least a few hours), seal the look with Polyvine Wax Finish Varnish.
• Choose Dead Flat for a matte, natural wood look.
• Choose Satin for a soft glow that mimics factory finishes.
• Apply 2–3 light coats with a good synthetic brush, letting each dry completely between coats.

Once the topcoat dried, I finished the piece with a layer of Dark Walnut Furniture Wax on the outer edges of the drawers to give it that added depth.
Final Thoughts
This process creates that refined but lived-in elegance you see in high-end furniture showrooms. The key? That sanding sealer base—don’t skip it. It allows you to wipe back your wash with control and achieve a smooth, streak-free finish that looks handcrafted, not homemade.
Let me know if you try this method—I’d love to see your results! Tag me on Instagram or drop a comment with your before-and-afters.


