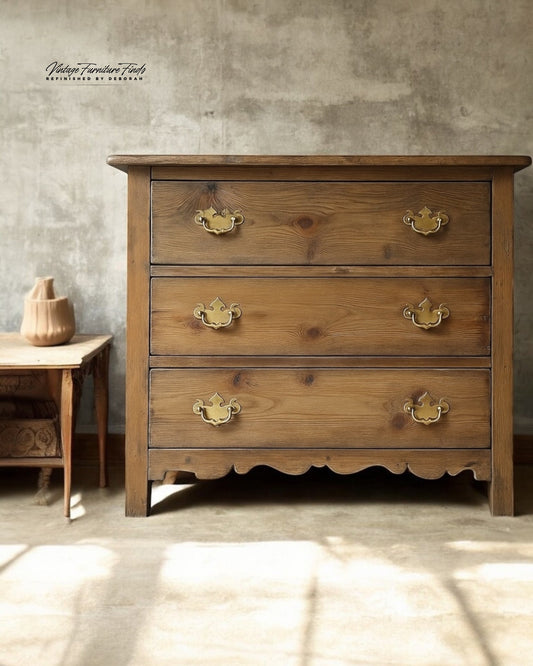
Oak furniture is a timeless classic, but giving it a fresh, updated look can make it feel new again. One technique that adds depth and texture to oak is raising the grain. I recently tried this method on an oak piece, and the results were stunning! In this post, I’ll walk you through my process, the tools I used, and the finishing touches that brought the look together.
Before we dive in, safety first! Always wear a mask, gloves, and eye protection when working with wood, especially when using power tools or applying finishes. Dust and fumes are no joke, and safety gear keeps you protected. Products I used can be found here.
Step 1: Raising the Grain with a Wire Drill Brush
To achieve that rustic, textured look, I started with a wire drill brush. This tool is excellent for lifting the softer wood fibers and accentuating the natural grain of the oak.
• Attach the wire brush to your drill.
• Work in the direction of the grain to avoid damaging the wood.
• Apply light to moderate pressure—let the tool do the work!
This step raises the grain by removing the softer areas of the wood, leaving behind a textured surface that highlights the beautiful natural lines of oak. 
Step 2: Sanding the Raised Grain
Once the grain was raised, it was time to smooth things out a bit. For this, I used my orbital sander with 120-grit sandpaper.
• Sand lightly over the surface to knock down any rough spots without completely flattening the texture.
• Again, make sure to sand with the grain for the best results.
The sanding step ensures that the surface is smooth enough for staining but still retains the enhanced texture from the wire brushing.

Step 3: Staining the Wood
Next, it was time to add some color! I applied a wood stain that complemented the rustic texture.
• Use a cloth or brush to apply the stain evenly across the surface.
• Wipe off the excess after a few minutes, following the manufacturer’s instructions.
The raised grain absorbs more stain, creating a rich, dimensional effect that really brings out the beauty of the oak.
Step 4: Applying a Topcoat
To protect the wood and give it a polished finish, I applied a topcoat. You can use a polyurethane, lacquer, or another clear finish of your choice.
• Apply the topcoat evenly with a brush or cloth.
• Allow it to dry completely before moving to the final step.
You can find my favorite Polyvine Wax Finish Varnish topcoat here.
Step 5: Adding Dark Walnut Wax
For the finishing touch, I applied dark walnut wax. This step added a layer of depth and warmth to the wood while enhancing the texture even further.
• Use a soft cloth to rub the wax into the wood.
• Buff it out for a subtle sheen and smooth finish.
The wax settled into the crevices created during the grain-raising process, emphasizing the texture and adding character to the piece.

Final Thoughts
This technique works beautifully on oak furniture, but I haven’t tested it on other types of wood yet. Oak’s natural grain structure makes it ideal for this process, as the wire brushing enhances its inherent texture. 
If you’re thinking about trying this, remember: patience is key. Each step builds on the last, and taking your time ensures the final result is worth it.
Have you ever raised the grain on furniture? I’d love to hear about your experiences or answer any questions in the comments below.
Happy refinishing!


