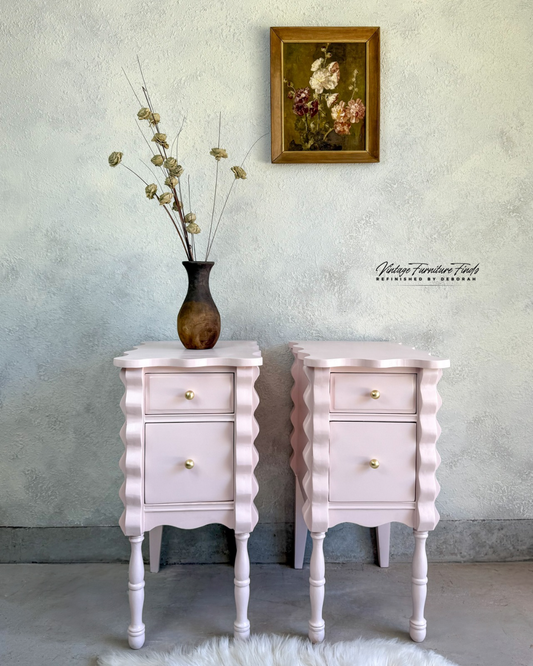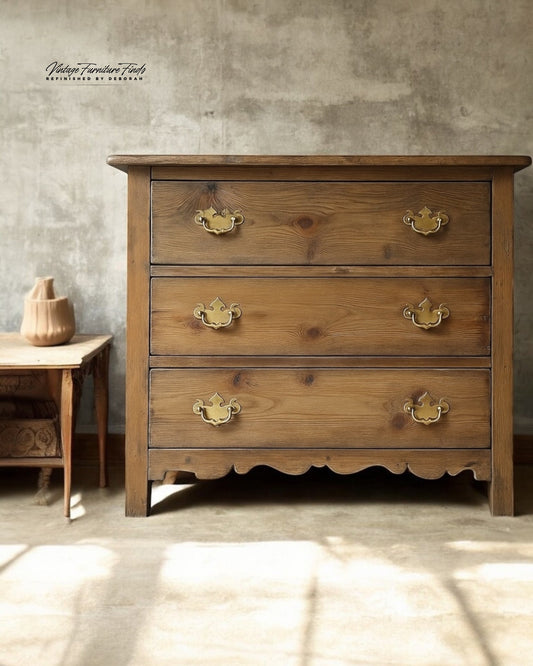
After putting in all the effort to refinish your furniture, the next step is to showcase it in a way that highlights its beauty and craftsmanship. Whether you’re looking to sell your pieces or build an Instagram following, staging and photographing your furniture is crucial for attracting attention and increasing sales. In this guide, I’ll share practical tips and tricks to help you achieve stunning photos without breaking the bank.
Staging Options: Creating the Perfect Setup
Finding the right spot to stage your furniture can make all the difference. You don’t need a fancy studio there are plenty of budget-friendly options that work just as well. I’ve personally experimented with different staging areas in my garage over time, and you can, too! Here are a few ideas:
Paint or Wallpaper a Wall:
A fresh coat of paint or stylish wallpaper can completely transform your staging area. Peel-and-stick wallpaper is a great temporary option, and it’s easy to swap out when you want a different look. Check out these wallpaper and flooring options here.
DIY Flooring Solutions:
Want to avoid showing your garage or home flooring? Purchase peel-and-stick flooring tiles and attach them to a large plywood board for an instant upgrade.
Dry Erase Board Hack:
One of my favorite affordable hacks is using a 24-in W x 36-in H dry erase board as a flooring option. When I’m not using it, I simply lean it against the wall. It’s a quick and easy solution that provides a clean, white look.
Concrete Chic:
If you have an existing concrete floor, embrace it! With the right backdrop, it can give your furniture a modern, industrial look.

One of my favorite staging setups involves using Homestead House Milk Paint to create a beautiful limewash effect on my garage wall. This method is affordable and looks stunning in photos. It only takes 1-2 bags of 330-gram milk paint, depending on your desired effect.
Here’s what you’ll need:
Milk Paint: Save 10% with my discount code at the Fusion Mineral Paint shop using code: vintagefurniturefindsfmp
STAALMEESTER Original Series Wall Brush: Available on the Fusion website
Bullet-Type Blender: I like to mix my milk paint in a blender, and I’ve linked one here: Bullet Blender. You can also find one at thrift stores for a budget-friendly option.
Lighting: Natural vs. Artificial
Lighting can make or break your furniture photos. While professional lighting equipment is available, natural light is always the best and most budget-friendly option. Here’s why:
Natural light provides a soft, even glow without harsh shadows or unnatural coloring.
Avoid yellow-tinted or overhead lighting that can distort colors and textures.
Position your furniture near a window or open garage door for the best light exposure.
Capturing the Perfect Shot

You don’t need an expensive camera to get great photos. Most newer smartphones have impressive camera capabilities that can capture high-quality images if you follow these tips:
1. Use Your Phones Grid Feature: This helps with alignment and composition to keep your shots balanced.
2. Clean Your Lens: A simple yet often overlooked step that ensures crisp images.
3. Shoot at Different Angles: Capture the full view, close-ups of details, and staged settings to showcase the pieces versatility.
4. Avoid Overediting: Keep colors true to life by making subtle adjustments instead of heavy filters.
Enhancing Your Images with AI
If you’re looking for an extra boost to your photos, AI tools can help. Photoroom is a fantastic app for staging still photos. It allows you to remove backgrounds, add stylish settings, and create professional-looking product images with ease. However, it’s not ideal for showing live details in videos.
A few tips for using Photoroom:
Take your time learning the app; it may take practice to get the results you want.
Describe or upload an example of your desired scene for the best AI-generated results.
Final Thoughts
There are endless ways to stage and photograph your furniture, whether you’re working in a small space or have an entire garage to dedicate. The key is to find what works for you and experiment with different backdrops, lighting, and angles. 
By using budget-friendly options like milk paint, DIY flooring solutions, and natural lighting, you can achieve professional-looking results without spending a fortune.
Ready to elevate your furniture staging? Don’t forget to use the discount code: vintagefurniturefindsfmp for 10% off at Fusion Mineral Paint.
Happy staging and photographing!


